Planet tutorials | Tutorials |

First it should be mentioned that this method is useful only for those cases when the planet is shown at the middle or background.
---------------------------------------------------------------------------------------------------------
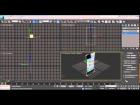
1. Create the scene in 3D MAX
2. In Geometry --> geosphere create a sphere sized 132 (it is not important what size it will be, it's up to you to decide)
3. Duplicate it twice increasing the size by 1% with each duplicating
4. The final sequense of spheres will be named accordingly: surface-the
surface of the planet; cloud-the layer of clouds(if you want a more
realistic view, create several layers); atmosphere-the atmosphere.
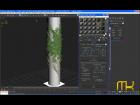
If you’ve done everything right the result will be as follows:

5. Let’s start from above:
Atmosphere.
Create Blinn material
Main parameters are set as follows:
Specular level -- 20
Glossiness -- 5
Soften -- 0,1
The atmosphere in the picture should only be shown by bluish thin rim, therefore gradient maps will play the main role:
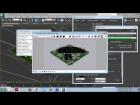
In Diffuse Color bookmark create Gradient Ramp material setting it like
in the picture below. Your atmosphere depends on the color you choose.
In Opacity bookmark also create Gradient Ramp material, here only
monochrome shades of gray are used. It is desirable that the white
color stripe coincides. This will be the reflection in the atmosphere.

And there is only one map left which defines the reflecting regions of Fallout:

Now it’s time to make clouds:
6. Cloud
Create Blinn material
Main parameters are set as follows:
Specular level -- 160
Glossiness -- 15
Soften -- 0,1
Insert the picture of cloudiness into the Diffuse Color bookmark (in web there are many finished samples and I won’t pay special attention to this).
It’s possible to put the same map as in Diffuse Color into the Opacity bookmark, only treat it previously having changed the colors to the shades of gray.
Create other bookmarks as shown in the picture below:

more here
Wanderer »
Gallery | More Tutorials | Added 17 years ago
Tools: 3DS Max (Autodesk), Brazil, VRay
Subject: Lighting, Modeling, Rendering, Texturing/Painting
|
log in to rate
Raters : 4 Views: 14,109 |
|





well, everything went alright until I had to make the clouds, you said on the tutorial that the clouds could be gotten off the web, I WOULD REALLY APPRECIATE HELP, COULD YOU TELL ME THE SITE YOU more …