Poser morphs in Hexagon | Tutorials |
Poser morphs in Hexagon using the Displacement Paint Tool
Export from Poser
Open Poser 6 and load your figure {I'll be using Jessie Hi-Res.} Select Hip and disable I.K. for the legs. Open up the joint editor window and zero the figure.
For this exercise I will be making a head morph for Jessie so I won't export more then her head.
Select your body part and go to File-Export-Waterfront object-Single frame and check OK. Uncheck Universe, select head and hit OK.
Name your file and save it somewhere you will remember...I named mine "workinghead". Uncheck everything except "As Morph Target" and hit OK.
Import into Hexagon
Close Poser 6 and open Hexagon 2
I use an import scale factor of 500.00 and export factor of 0.002
The body part will import correctly in the Perspective view but you will have to pan up in the front and right views. To zoom out in the top view you will need to use the mouse wheel.
Switch to perspective view and select the body part, depending on what body part your morphing the symmenetry tool in the x field can be helpful, as in my face morph.
In this tutorial I will be doing a face morph for Jessie, something close to a Klingon forehead. Start by clicking the UV & Painting tab and pick the Displacement brush tool.
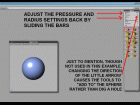
Depending on your morph you can adjust the strength or size of the brush. Changing the stroke from Dots to Freehand can have a more varied affect.
With the default strength and size used I'll just paint a few strokes on Jessie's forehead. Be sure to hit enter (or validate) after you are satisfied with your morph. .
Export out of Hexagon
To export just hit File-Export-Wavefront and export under a new name. Be sure to use 0.002 as the export size.
Close Hexagon and open Poser. Load the figure you've made the morph for and undo the IK for the legs. Open the Joint Editor and zero the figure.
Select the body part you made the morph for and in the Parameters Window click "Load Morph Target". Navigate to your saved morph and press ok.
Your morph should show up as the top morph in the Parameters Window
Happy Morphing!!
partyman »
Gallery | More Tutorials | Added 17 years ago
Tools: Poser
Subject: Modeling
|
log in to rate
Raters : 2 Views: 4,552 |
|
| Feedback & Discuss | Post a Comment |


