MAKING A WINTER SCENE TUTORIAL | Tutorials |
I want to share my workflow in making a WINTER SCENE.
Creating A Winter Scene
1. setting up the scene
display unit scale : meters
system unit scale : meter
2. Create a plane. Size varies to your scene requirements. Segments will determine the bumps for your snow landscape so its up to you how you will make your segments. As we goes, you can discover why. For these tutorial i created the plane with the following properties
size : 10m x 10m
lenght segment : 30
width segment : 30
3. Create an object in the middle, any object will do, just to to make the scene not empty. For this tutorial i put 3 teapots.
4. Create a camera, this will help in the final output of the your image rather than an ordinary perspective. settings will be adjust later, but the angle, height elevation can be at your own preference.
5. Create lights just for global illumination and scene effect. I put one omni light on the right with .5 intensity and color filter of 93, 96, 97, shadow has turn of, and another direct lights on the left, intensity of 1.75, color filter to white, shadow map turn on, provide far attenuation of about start=16 and end = 22m.
6. Now let us prepare the scene. Let me go first to the snow landscape, I applied with noise modifier for the plane to make it wavy and bumpy. The more the segments you provide for the plane the more it become bumpy. Although you can do these in many different ways and methods.
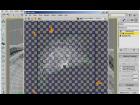
7.Creating materials for the snow landscape, on materials slot rename one as snow, i just make the diffuse color to white, and self illumintaion to 50, Going down to maps, make the bumps to 75, then choose smoke for the bump materials. From smoke parameters, adjust the size = 1, phase = 1, iterations = 5, for color 1 make it dark gray and color 2 make it white. Then on reflection box, make it 15 and select raytrace for the reflection map.
[IMG]http://i73.photobucket.com/albums/i207/rpadc2002/cg%20arena/snow-landscapematerial.jpg[/IMG]
Test render
[IMG]http://i73.photobucket.com/albums/i207/rpadc2002/cg%20arena/initialsetup.jpg[/IMG]
Hitting render comes my initial render as shown on figure 2.
[IMG]http://i73.photobucket.com/albums/i207/rpadc2002/cg%20arena/firsttestrender.jpg[/IMG]
8. For the environment. I just use gradient ramp materials. I just use gradient ramp. See figure 3
[IMG]http://i73.photobucket.com/albums/i207/rpadc2002/cg%20arena/enviromentmap.jpg[/IMG]
and a test render .
[IMG]http://i73.photobucket.com/albums/i207/rpadc2002/cg%20arena/secondtestrender.jpg[/IMG]
Since camera and lights are already set, i just hide for the meantime so i can see clearly what i am doing.
9. Now for the creation of the falling snow.... on the creating panel, browse on PARTICLE SYSTEMS and on object type choose BLIZZARD. Or go to tab menu, select CREATE then on the list select Particles then blizzard. On top viewport drag anywhere on the screen preferably same location where your plane was created, of about 6 x 6 m, then on front or left viewport move it vertically just enough for you to see the falling snow ( it can be adjust later).
[IMG]http://i73.photobucket.com/albums/i207/rpadc2002/cg%20arena/blizzardcreation.jpg[/IMG]
[IMG]http://i73.photobucket.com/albums/i207/rpadc2002/cg%20arena/blizzardcreation2.jpg[/IMG]
While the blizzard emitter is still highlighted, go to modify, then on Basic parameters, go to viewport display and press the radio button for your preference diplay (dots. mesh, ticks) then adjust the percentage of particles = say 50%. To see things of what you are doing, move the time slider on the bottom of your drawing area to 30.
On the Particle generation, on the use rate provide 50 on the box ( it can be adjust later depending on how you want the final image looks like.) Particle Motion speed = .2m, variation = 2%, on Particle Timing go to display until=100 and life to = 100, particle size = .02m, and variation to 5( approximately, adjust it later to a viewable size later) Down the items go to Particle type, select standard particles, then select sphere. This is now the shape of the snow when you rendered.
[IMG]http://i73.photobucket.com/albums/i207/rpadc2002/cg%20arena/blizzardsetting.jpg[/IMG]
Now the setup is almost complete, apply the materials you have created and make some test render. Adjust those primary figures you provided, until you are satisfied with the result especially the particles number, and sizes.
10. You have now created the basic snow scene. To add some effect, unhide and select your camera, and click modify then enable some parameters. Now right click on the particles and go to object properties. On the general option, go to motion blur and enabled it. Then select image. make a render. Or choose object, whichever is fiited to your preference. So you now see the difference between object motion blur and object motion blur. which is which- its your choice which one make you feel is good for you.
Motion Blur then make a test render how it looks.
[IMG]http://i73.photobucket.com/albums/i207/rpadc2002/cg%20arena/render-objectmotionblur.jpg[/IMG]
Or motionblur with pass blending
[IMG]http://i73.photobucket.com/albums/i207/rpadc2002/cg%20arena/renderwithmotionblur-passblending.jpg[/IMG]
Or activate Pass Blending with dither strenght say .2 or .2.
[IMG]http://i73.photobucket.com/albums/i207/rpadc2002/cg%20arena/render-withditherstrenght1.jpg[/IMG]
11. Now to finalize and make some bit action for the snow. Go to creating Panel, select Space warps then on object tye select Wind, or you may go to Tab panel, select Create, browse down and select Space warps then Forces then wind. On your left view port drag on the screen until you have created a rectangular shape with arrow on the center which is the wind emitter. see figure. Rotate, move where you want the wind might come. And on parameters, give them a strenght of .2 for the meantime..
[IMG]http://i73.photobucket.com/albums/i207/rpadc2002/cg%20arena/activatewind.jpg[/IMG]
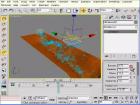
12. Then while it still selected, select bind to space from your tool bar then drag the wind emitter to particles, until it links there. (If you cant see the bind to space warp toolbar, right click on empty area on the toolbar menu then select Link/unlink.) Now select your particles then go to modify and see if it was succeesfully binded. You will see WIND Binding (WSM) on the modifier stack. and see what happen to the particles. See image samples. then adjust the wind parameters in modify panel until you are satisfied with the reation of the particles. MAKE A FINAL RENDER.
[IMG]http://i73.photobucket.com/albums/i207/rpadc2002/cg%20arena/finalrender-imagemotionblurenable.jpg[/IMG]
and a night scene render
[IMG]http://i73.photobucket.com/albums/i207/rpadc2002/cg%20arena/nightscene-final.jpg[/IMG]
To add some effects, you can copy the particles, move it a little bit farther, and change object properties, by turning off its motion blur, the effect could be something - a mixture of falling snows.
Any question and comments, just send me a message here in this thread or to my email at rpadc20022yahoo.com
ronel k. pabico »
Portfolio | Gallery | More Tutorials | Added 17 years ago
Tools: 3DS Max (Autodesk)
Subject: Particles
|
log in to rate
Views: 2,741 |
|
| Feedback & Discuss | Post a Comment |


