by: tofusan

tofusan »
Click and login to follow "tofusan" new uploads

Portfolio | Gallery | More Materials | Back
Added 15 years ago

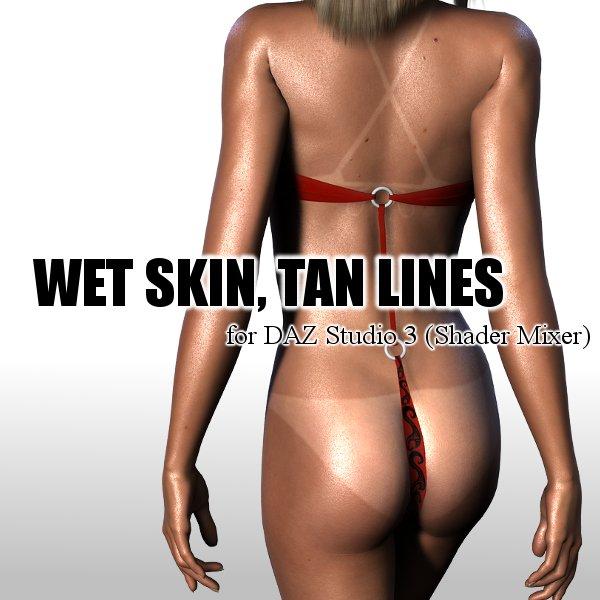
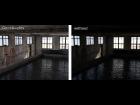
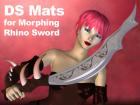
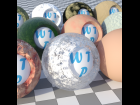
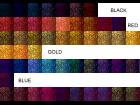
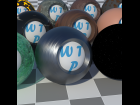
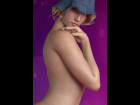
Skin shader for DAZ Studio 3.0 /4.5(Shader Mixer). includes 2 shader preset: WET, DRY and some sample tan lines mask image (V3, A3, V4). 04-05-2011 Updated: …
more »


Format: DAZ Studio *.daz *.ds *.dsb
Categories: Other
Usage Rights: Non-commercial use only
log in to rate

Raters : 22
Views: 26,002
Downloaded: 4,645


Feedback & Discuss Post a Comment
aldebaran (9 years ago)Inappropriate?
Great, thank you very much!
Sky (10 years ago)Inappropriate?
I don't have the option to set the texture to "Diffuse" is this just me? Should I just set it to the default skin texture or will that mess it up? Please help.
Maxxxima (10 years ago)Inappropriate?
Can someone tell me if this works on Reality 2 and if works, how is the configuration inside reality 2 ?
Thank you
Maxxxima (11 years ago)Inappropriate?
Tofusan, is clear like water, the instructios says:
A3, V3 & V4.
I discover another way to do it. this way is so difficult.
Click on Wet And Than (What you need to apply)
Find WetAndTan in Shaders
Hold CTRL + Click On WetAndTan
Then appears a menu
Options:
Surface - Selected
Imges - Ignore
Accept
The rest you do in the surfaces menu.
tofusan (11 years ago)Inappropriate?
@sinman: The form of tan line uses a mask picture. To create a mask picture, it is easy if 3D painting functions, such as Blender, are used. The brightness of skin can be changed if parameters "Tan Color" and "Tan Line Color" adjusted.
Happy New Year! :)
sinman (11 years ago)Inappropriate?
Could someone please post alot more examples. Also are the tans controllable somewhat? like making the tan darker and white lines white? Also can you soften the lines were darktan meets white skin?

I seen a tanning product about a year ago that said you could apply tans to any model in daz3d/poser and the controls allowed you to control how dark the tan was, type of bikini worn that caused the more …
savanna (11 years ago)Inappropriate?
Thank you so much :)
tofusan (11 years ago)Inappropriate?
@Maxxxima: Do you use Genesis 2 Figure? The tutorial is made ��for using Victoria4. Material name is different V4 and Genesis2. However, those corresponding to the material numbers, exists as a Template Number in Genesis2 Surface.
Maxxxima (11 years ago)Inappropriate?
Please, not work for me, i've problems, the tutorial isn't very good explain. I need thet somebody help me.
Everythin ok to pass number 4, but the pass 5 is not very good explain, can someone hel me Please.
Sorry my english y speak spanish:
Thans
truthordare (11 years ago)Inappropriate?
No, thank YOU! The beauty of your shader is that it's not just for tans. Even if you don't want or need to use the tan line or the wet shader (which is the best one I have seen, by the way), just the dry skin shader alone simply brings skin mats to life! It's simply outstanding, rivaling even the Human Surface Shaders in realism... maybe even exceeding them! I'm using it more …
tofusan (11 years ago)Inappropriate?
Thank you for your rendered image. I perk by looking it. :)
truthordare (11 years ago)Inappropriate?
Please see my Gallery for an example of your wonderful shader in use.
truthordare (11 years ago)Inappropriate?
I'll have to try your solution on the next character. Meanwhile, whatever I did seems to have worked. I'm trying to figure out how to upload an image to my gallery here.
tofusan (11 years ago)Inappropriate?
With your using the displacement, there is a possibility that the face skin was sunk on the inside of the eyebrow. I think that if set zero to minimum displacement, face skin becomes to avoid sinking. And also, please be set to 0 in both the maximum and the minimum displacement of eyebrow.
truthordare (11 years ago)Inappropriate?
I think I solved it. I'm not sure if it's the "correct" solution, but in my case, I apparently have to turn the eyebrow zone ON, load my character's skin texture, apply your shader, and then apply my displacement base. Seems perfect. I'll try to upload some test images if possible, once I'm done fine tuning.
truthordare (11 years ago)Inappropriate?
At this point, everything looks fine, except that the eyebrow zone is showing up pink or flesh-colored after applying your shader. I have the zone turned off in the Scene tab, as it is by default. My character's skin mat renders fine until I apply your shader to Groups 1 through 3 (starting with lip), at which time the brow turns pink, like a mask. What do I need to do to get the brow more …
tofusan (11 years ago)Inappropriate?
I was relieved. I think some parameters not being kept for when you apply a preset, the difference between the name of the this and UberSurface is causing the problem. Please adjust manually such parameters. ;-)
truthordare (11 years ago)Inappropriate?
Got it working! I need to dial in some things, but the vascularity is retained! Thank you!!!! :D
truthordare (11 years ago)Inappropriate?
Thank you for replying!

I don;t think I'm following you though. What's happening is that my character uses the Ubersurface2 shader, with her vascularity in the displacement channel. But when I apply your preset, it wipes out the Ubersurface2, including the displacement, even when I select Ignore. So I'm looking for a way to use your preset without changing my character's more …
tofusan (11 years ago)Inappropriate?
Displacement map now available. However, if you don't want to use it, please set to 0 the maximum and minimum displacement. :)
truthordare (11 years ago)Inappropriate?
This is a wonderful product, and I thank you for offering it. However, I am using the displacement channel for vascularity, and the WetAndTan presets totally obliterate it. Is there a way to use your produce and still retain the displacement channel.

Thank you again!
tofusan (12 years ago)Inappropriate?
Hello. I have updated the file. Dry and SSS presets added. If the edges of the skin becomes too red, please set white to Outer Color property.
Thanks. :)
Redbull1984 (12 years ago)Inappropriate?
I found It i think!
Changing the Glossiness too 100% & also, if you have nipples, you can change that too 225 White

Victoria 4

1_Skinface - 3_Toenail Selected in Surface Editor

Find WetAndTan in Shaders

Hold CTRL + Click On WetAndTan

Options:
Surface - Selected
Imges - Ignore
Accept

1_Skinface - 3_Toenail Selected in Still selected inSurface Editor

Change (1_Skinface more …
Redbull1984 (12 years ago)Inappropriate?
Hello Tofusan!

Thank-you for this!

I have DS4.5, i can get both Tan & Wet look fine, i would like just Tan lines with out the wet skin map?
What i am doing:

Victoria 4

1_Skinface - 3_Toenail Selected in Surface Editor

Find WetAndTan in Shaders

Hold CTRL + Click On WetAndTan

Options:
Surface - Selected
Imges - Ignore
Accept

1_Skinface - 3_Toenail Selected in Still more …
westcpw (12 years ago)Inappropriate?
anyone know how to use this with Reality and Luxrender?
tofusan (12 years ago)Inappropriate?
@Tramp_Graphics: Hello. I have updated the shader preset for DS4.5 today. If you apply it while holding down the Ctrl key, you will be able to apply a shader without changing the texture.�If you using without tan line map, then please set simply black to tan line color property, without texture. Thanks.
Tramp_Graphics (12 years ago)Inappropriate?
I just tried using this on a couple of Genesis characters in Daz 4 without using a tan line map since all I wanted was the wet look, but it's washing out the skin textures when rendered. Your tutoral only covers applying tan lines (which I don't want for the piece I'm working on). How do I use this for the wet look without tan lines?
Windigo (12 years ago)Inappropriate?
Thanks Tofusan. (Mckolb - I want to know also)
tmpdev (12 years ago)Inappropriate?
@McKolb: Can you explain how to do it in 4.5? The screenshots provided with the download are to low-rez to read.

Kind Regards.
Mckolb (12 years ago)Inappropriate?
Thanks Much ! Works fine in 4.5.0.136 Beta
hans2540 (13 years ago)Inappropriate?
Thank you so much!
Akanaro (13 years ago)Inappropriate?
Still working in DS4. Thank you very much for this.
AlleyMouse (13 years ago)Inappropriate?
Thank you, this is awesome !
tofusan (13 years ago)Inappropriate?
No problem, Thanks for the thoughtful comments of your mind. :)
takezo3001 (13 years ago)Inappropriate?
Ahhh! I'm sorry, I did not know that this page cannot show Asian script, I do thank you very much for all that you have given us, I will send my message to your Lux Render site!
takezo3001 (13 years ago)Inappropriate?
æ�¥æ�¬ã�®äººã��ã�¨å½¼ã��ã�®å¯�大ã��ã��ã��ã��ç§�ã�«ç�¥ã��ã��ã�¦ã��ã��ã�®ã�§& more …
Lacostinas (13 years ago)Inappropriate?
Very very nice!!!! Thanks +100000 !!!
Kuroma (14 years ago)Inappropriate?
Suge! arigato.
Semicharm (14 years ago)Inappropriate?
Awesome! Thank you so much! I try to make a tan line texture when I get the chance. ;)
tofusan (14 years ago)Inappropriate?
Hi, Semicharm. I set the type of image-brick in opacity to float, preview was correctly displayed. I have updated the zip-file. Thanks. :)
Semicharm (14 years ago)Inappropriate?
Thanks for checking into that. Opacity works in renders now, but not in the preview. I don't know if it has anything to do with the opacity strength being set as color rather than a value.
tofusan (14 years ago)Inappropriate?
Hello, Semicharm. I fixed the problem of Opacity. Prease re-download. DS3 is not effective of the "Ignore map" setting of shader preset. I think that this is a bug of DS3. Thank you for your great comment. And thanks so much for other lot of great comments.
Semicharm (14 years ago)Inappropriate?
Works OK without shader mixer, just takes a bit of work to redo the texture settings and set the tan lines map. For the areas not covered by the tan lines, simply make the "TanLine" setting black (all 0's). No need to waste time with an extra texture. There does seem to be a bug though--there's no option for a transparency map. The wet shader can't be used on lashes or more …
milan528 (14 years ago)Inappropriate?
very nice! thanks
Andrew_C (14 years ago)Inappropriate?
Works very well with plain DS3 without Shader Mixer, just have to reapply skin textures after applying it (it ignores "ignore maps", unfortunately) and create a small black png or jpg for the tan template for areas without tan lines, or things look odd. Thanks :)
marc657 (14 years ago)Inappropriate?
spot on new to this and loving it
hamstergirl4444 (14 years ago)Inappropriate?
How did I miss this?! Thank you, this looks awesome AND very useful! :)
Mark Christian Holloway (15 years ago)Inappropriate?
I do not think anyone has ever thought of doing this before. Great idea making tan lines, Thank you
ReDave (15 years ago)Inappropriate?
This loos very interesting, thanks for making it available! I wonder why you used Divide twice?


© 2024 Internet Business Systems, Inc.
670 Aberdeen Way, Milpitas, CA 95035
+1 (408) 882-6554 — Contact Us
ShareCG™ is a trademark of Internet Business Systems, Inc.

Report a Bug Report Abuse Make a Suggestion About Privacy Policy Contact Us User Agreement Advertise