Melting text effect in Maya | Tutorials |
Hello every one!
And welcome to wonderful world of fluids, My name is Aziz Khan and I will be your guide through this tutorial I hope you will enjoy doing this.
In this tutorial we will explore some tools and options of fluid to create melting text effect like smoke, this tutorial is very handy for those of you who are going to create short movies or demo reels to give it heading using this method describing in this tutorial.
fluid effect is one of powerful tools inside Maya which can achieve realistic result easily with in few minutes if you are expert and have creative mind, before going to start with this tutorial I am suggesting you that you should basic knowledge of Maya.
ok lets get started.
1-first of all we need some text in (Targa), or (Jpeg) formats, the text is dose not matter what are you going to write it should be with black background, here I am going to show you what I mean.
2-ok open Photoshop and create new fresh page with the same setting as in image describing below,
Note: this setting is just for this tutorial you are not bound with the size of document you can create it in any desired size you like.
If you feel lazy to create these images you may download it from (here) but I suggest you to create it by yourselves.
3-when your new file is open write any thing you like in this case I wrote the words below, make sure your background is black and save it as .Targa and name it (Density).
4-now create one more with the same setting and then change the text color to what ever you like, and then save it as .Targa and name it (Color) like the picture below.
5-we are done with Photoshop here, switch to Maya on the view port hold down (H) key from your keyboard and then hold down left mouse button from pop up menus choose (Dynamics), now we have access to fluid effect, now click on (Fluid Effects) from dropdown menu hit on that small rectangular beside 2d container. like the image illustrating below.
6-now your fluid option box will appear in the (X Y Resolution) give value of 300 by 300 this will increase detail when we import our text images, then hit (Apply and Close) like the picture below.
Note: the bigger resolution value the slower render and system performance, do not increase the values out of your requirement.
7- if you look at your scene you have created a 2d fluid container, like the pictures indicating.
8-with the 2d fluid container is still selected again go to (Fluid Effects>>Add/Edit Contents>> then select the option box for (Paint Fluid Tool), like the image down.
9-now you should have some thing like the image below on your right hand side of user interface, since i am using Maya version 8.0,
10-ok expand (Paint Attributes) tab, on the (Paint Attribute) dropdown menu by default it set to (Density) leave it like its, now expand (Attributes Maps) you will see one more tab (Import) expand it too this will reveal (Import) button, click on it and the file browser will open for this one choose (Density.tga) where you saved your images and import it, like the image illustrating below.
11-press (6) button from your keyboard you should see something like the image.
12-go to (Paint Attribute) tab again and this time choose (Color) from dropdown menu and the it will ask you to set it (Set to Dynamics) and hit the it, click once again on (Import) button and choose (Color.tga) image from your hard drive, like the image below.
13-now you should see according to your text image, if you follow along with me you should have like the picture below.
14-hit CTRL+A to bring the (Attributes Editor) now find out (Dynamic Simulation) tab expand it and set the (Start Frame) to (45) what ever number you like your animation to start, like the picture.
15-Expand the (Contents Details) tab from (Attribute Editor) and then expand the (Density) tab too set the numbers like the image below.
16-scroll down little bit to find out (Shading) tab and expand it set the (Glow Intensity) to (1) or what ever you like your texts reflect the glow, as in the picture showing below.
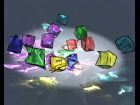
17-here we are done set your frames to 200 or as your choice then hit play you will see your texts are melting down and then dissipating slowly like smoke, these 2 renders are just to show you how its looks like after rendering.
and few frames played,
you can also download the end scene from here.
I hope you enjoyed doing this tutorial and try it your own pace with different images to get different kind of results.
if you have any kind of suggestions, feed backs, questions, or comments, please feel free to write me I will be happy to hear from you.
a_k517@hotmail.com
aziz3d »
Gallery | More Tutorials | Added 17 years ago
Tools: Maya (Autodesk)
Subject: Animating
|
log in to rate
Views: 9,884 |
|
| Feedback & Discuss | Post a Comment |


