Creating a Brick Texture | Tutorials |
Texturing a House Tutorial Part1
Link to raw image for use with this tutorial:
http://www.sharecg.com/v/6551/texture/RawDarkBrick
The first thing you need is either a decent digital camera, and/or a decent bit of software like PhotoShop, PaintShop, The Gimp (which is free) or something similar.
Then you need to look around you for something that would enhance a 3d model. What do people make 3d models of?
Well it really depends what you are interested in.
But just suppose, for the sake of argument, that you want to create a simple street scene.
Okay so you created your simple house, now you need to texture it. (or you found some models somewhere).
To create a workable texture for a house you need to point the camera as squarely as you can at the brick wall of the house that has some nice bricks on it. Try to line the bricks up with the edges of the view in your camera''s viewfinder as closely as you can - this will save a lot of work later on.
Now supposing that you have the bricks nicely lined up and there are no shadows on the wall, nor any awkward cables or single odd looking bricks, there''s no moss growing only at the bottom of the wall, and it all looks fairly uniform.
Great, this is exactly what you want!
Take the picture (use auto setting if you''re not sure what setting to use). Take a few pictures of this wall, moving along a little each time - making sure you''re square on to the wall every time though.
Once you have the images, you now need the image editing software.
The camera should explain how to get the image onto your computer - but assuming you''ve done that and opened the image in ... let''s go for PhotoShop, I''ll say a little about PaintShop later.
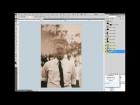
Open PhotoShop (- Elements does this too) open the image.
and now choose Filter from the top menu list
And from the drop down menu, choose "Offset".
Now in Elements you have to type in the numbers to offset the image by - in the image I''m using it turned out to be 4300 and 4500. In PhotoShop CS you just move a slider, one for horizontal and one for vertical. I like to get the splits in the image as central as I can, it gives you more room to work and it''s easier to see where you''ve been.
Now you want the clone stamp tool. It''s in the tools bar down the side of your workspace, the left-hand side, unless you''ve undocked that menu and moved it...
The one circled in green.
Now set the size of your brush to about 63 pixels.
(Brush size is circled in pink)
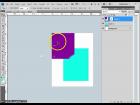
Now all you need to do is copy the image from one location and paste it to another - this is what the clone brush does - you tell it where to take pixels from by holding down the Alt Key and clicking in the area of the image where you want to clone from with the left mouse button. The moment you release the Alt key and click again in the canvas - make sure your cursor is where you want to paint - and from then on the source will remain the same distance from your cursor.
For this reason, it''s best to keep changing your source (alt and mouse click) fairly often, otherwise you may find you are painting with a white line (where the cement is) instead of the nice dark brick texture. Also frequently changing your source stops obvious patterning from becoming evident.
Here:
The green outline shows where I have done some cloning, the orange shows where the concrete line still shows from the upper section, but that can be either removed by cloning brick in there or increased downwards to make a small brick insert - the choice is yours.
Personally I think making a small brick insert there wouldn''t look quite right as the other small bricks in this texture aren''t quite that small and that may make it look too patterned...
Also look at the areas circled in black - these small defects in individual bricks will probably also make the texture look patterned when tiled many times, so they need to be tidied up as well.
For this, take your cloning source from the corner of another brick of similar colour to this one...
For a new white line take your source from an existing white line and so on and so on...
Okay everything looks okay now, yes? Think you''ve finished? Well maybe you have... and maybe not. The thing to do now is to test it...
Select "Filter" from the top menu again and again choose "Offset" from the drop down menu. Use the same sort of position for the offset (about 4300 by 4500,if using PhotoShop Elements, or just do it by eye using the slider if you''re using PhotoShopCS).
Now, look carefully along the center of the image, both horizontally and vertically – can you see any odd, too straight lines, or abrupt changes from a light to a dark brick texture in the middle of a brick?
If you can, then use the clone brush to smooth them out. If you can''t then just cancel the Offset filter, and you''re done. (for the moment)
I then like to check my textures using them on a 3d model tiled from about 4 times to maybe 20 times, depending on the texture image – just to see what it looks like. It may now look fine. Or, as I just found, you may see some patterning developing as you increase the number of times you allow it to tile.
Look at the brick cube on the right, and then look at the one on the left – can you see the slightly darker bricks in the right hand cube, making what is almost a line down the vertical centre of the cube? In the left-hand cube this line is gone.
All I did was to use lighter brick colour to lighten the darkest bricks, with the clone brush.
If you leave that line of dark bricks there and you need to cover a large building with this texture, then the pattern is going to become very obvious, and will ruin a good scene.
The one of the left however showed no signs of patterning at the same tiling frequency, and even at a much higher frequency the patterning (which is pretty well unavoidable in bricks by their very nature) was much less noticable in the left hand texture, than in the right.
Next we will tackle the more difficult task of straightening out an image of rooftiles...
FranOnTheEdge »
Portfolio | Gallery | More Tutorials | Added 18 years ago
Tools: Adobe Photoshop, Bryce
Subject: Texturing/Painting
|
log in to rate
Raters : 2 Views: 6,967 Downloaded: 48 |
|
| Feedback & Discuss | Post a Comment |


