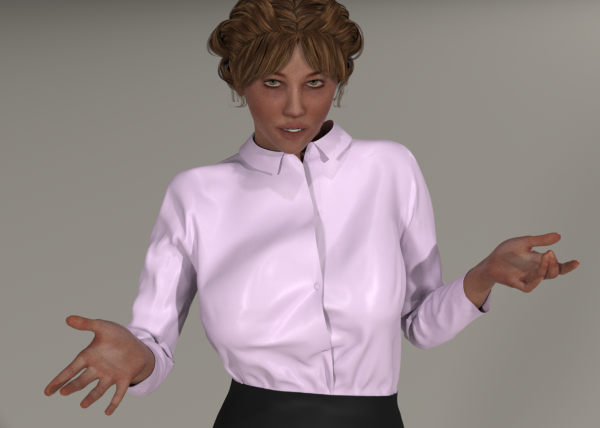
This Poser Dynamic Prop has been designed to be used in Poser 11 using ProjectE. It is a 5 button small wing collar blouse.
The default blouse can be used as is, all cloth groups / parameters have been set using EZCloth, please note the high stretch resistance of 980, this is to ensure the polygons acting as the button thread do not stretch, also the material was designed to be like fine silk, which really doesn't stretch.
To get the best results it is suggested that all three check-boxes in the simulation settings are checked, also as the material is supposed to be silk, an offset and collision depth of between 0.1 and 0.2 is recommended.
I have provided 10 variants
Office Blouse All buttons fastened
U1 the top button is undone
U12 the top and second button is undone .... UAll no buttons The same sequence is repeated unbuttoning from the bottom upto U5432
Basically a red dot on the image represents an unfastened button
That's the easy bit. The slightly more difficult part comes when you want other combinations of unfastened buttons. Unlike with conforming clothing it is not possible to create unbuttoned morphs and use them in the cloth simulator. To get around this you will need to remove some of the geometry of the blouse. This can be done in Poser but requires a few steps AND IS DONE AT YOUR OWN RISK!!!!!.
#1 Decide which buttons need to be undone.
#2 In the pose room (not the cloth room) with the blouse selected open the group editor. and for each button you want undone, select the appropriate group from the drop down, they are called Buttoned1, Buttoned2 to Buttoned5. The top button is Button 1 and the lowest button 5. (The main window should show 4 Polygons selected) With the appropriate group selected choose "Delete Polygons" from the bottom of the group editor window, reply Ok to the confirmation window. Rinse and repeat for each undone button. Once you have finished, close the group editor window and change the value of the corresponding morph for each affected button from 0 to 1, e.g. if you deleted groups Buttoned1 and Buttoned3 set ButtonOpen1 and ButtonOpen3 to 1 leaving the other 3 at zero.
#3 If you have already added the blouse to the simulation select it in the cloth room and choose "Unclothify" from the simulation settings, then clothify it again. (Clothifyiong appears to take acopy of the geometry at the time you clothify)
#4 Run the simulation.
You can save the new version back to the library for later use if you want.
To help with initial fitting and altering styles several pre-sim morphs are included. « Less



 Easter Sunday Outfit for Kids 4




Amanda